One of the advantages of Arcjet being an SDK that sits inside your application is that you get maximum flexibility over how the rules apply. Want a higher rate limit for your paying customers? Done. Want some end-points to be available to bots? Not a problem.
The downside is that any configuration changes need to be applied by redeploying your application. One solution is to dynamically configure rate limits from your database or based on a user session. Another option is to use feature flags to inject dynamic configuration values which can easily be changed at any time. This is particularly useful if you normally don’t need rate limiting, but want the option to enable it for emergency situations, such as a sudden surge in traffic.
In this article, we’re going to take an example of a Node.js + Express application that has a single endpoint, protected by Arcjet’s Shield and Sliding Window rate-limiting. In order to provide the configurability without having to push new code, we’ll retrieve the configuration from various LaunchDarkly flags.
What is LaunchDarkly?
LaunchDarkly is a feature management platform that allows developers to toggle features on or off without deploying new code, making it easier to test in production and roll back if necessary. Feature flags can be applied to specific user segments, allowing for personalized experiences and gradual rollouts. Through the LaunchDarkly dashboard, you can manage feature flags dynamically, making instant changes that take effect immediately without redeploying your application.
In this example, we treat Arcjet configuration as a set of features that we can control from the LaunchDarkly dashboard. By doing so, we gain the ability to dynamically adjust rate-limiting rules and other security settings in real-time, responding quickly to changing conditions and threats without redeploying our Node.js application.
Creating a basic Node.js + Express app
In an empty directory, let’s install Express web server and some dev tools that allow us to benefit from type definitions in IDEs like VS Code.
npm init -y
npm i express
npm i --save-dev @types/node typescript
And create a lightweight entry point for our application:
// file: /index.js

import express from "express";

const app = express();

app.get("/", async (req, res) => {
  res.send("Hello World!");
});

app.listen(3000, () => {
  console.log("Server started at http://localhost:3000");
});
Update your package.json so .js files are treated as ECMAScript modules (ESM), and to add a start script:
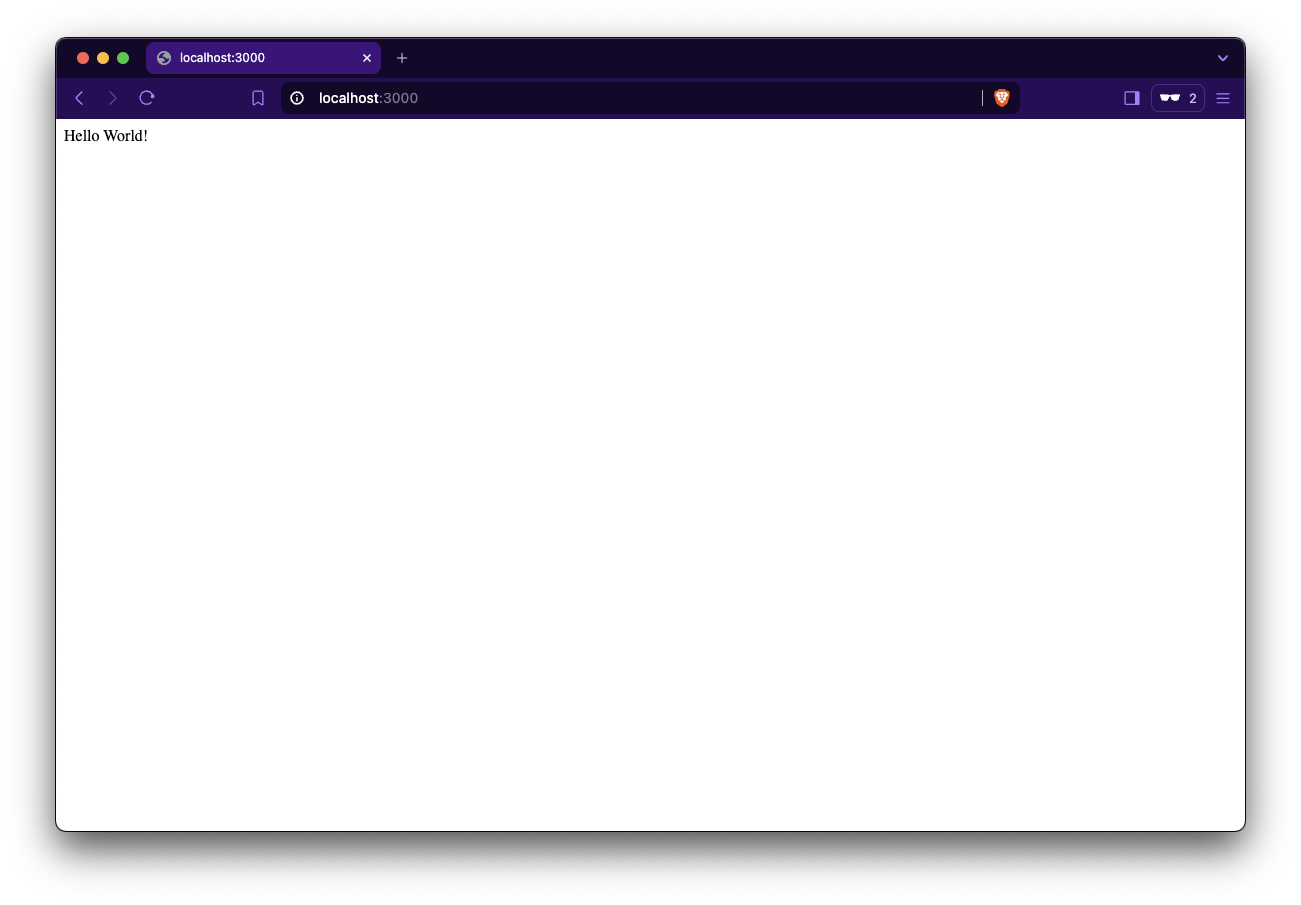
You should see the message that “Server started at http://localhost:3000”. Head to your local server and you’ll be greeted with “Hello World!”
Securing with Arcjet
Install the Arcjet SDK:
npm i @arcjet/node
Create a new file, /lib/arcjet.js in your document root:
// file: /lib/arcjet.js

import _arcjet, { shield, slidingWindow } from "@arcjet/node";

// Initialize Arcjet with your site key and rules
const aj = _arcjet({
  // Get your site key from https://app.arcjet.com
  // and set it as an environment variable rather than hard coding.
  // See: https://www.npmjs.com/package/dotenv
  key: process.env.ARCJET_KEY,
  rules: [
    shield({ mode: "LIVE" }),
    slidingWindow({ mode: "LIVE", max: 10, interval: 60 }),
  ],
});

// This function will return an Arcjet instance with the latest rules
const arcjet = async () => {
  return aj;
};

export default arcjet;
You might be wondering why we’re wrapping this in so much code. After all, why not just export default aj? Normally that would be fine, but as we’ll be dynamically changing the configuration later in this article, we’re setting the structure ahead of time for ease.
Now, import the arcjet method in /index.js:
// file: /index.js
import express from "express";
import arcjet from "./lib/arcjet.js";

...
Before we return “Hello World!” again, we’re going to ask Arcjet for its decision and react to any recommendations to deny access:
// file: /index.js

...

app.get("/", async (req, res) => {
  // Get an instance of Arcjet from our custom module
  const aj = await arcjet();
  // Get a decision from Arcjet for the incoming request
  const decision = await aj.protect(req);
  // If the decision is denied, return an appropriate status code
  if (decision.isDenied()) {
    if (decision.reason.isRateLimit()) {
      return res.status(429).send("Too many requests");
    } else {
      return res.status(403).send("Forbidden");
    }
  }
  // If the decision is allowed, return a successful response
  res.send("Hello World!");
});

...
Finally, we’ll add our ARCJET_KEY to .env.local. If you don’t have one yet, now’s the time to sign up for your free Arcjet account. Once registered, you’ll be prompted to create a new site to get a key.
# NODE_ENV is not set by the environment
ARCJET_ENV=development
# Add your Arcjet key from https://app.arcjet.com
ARCJET_KEY=
With all these changes saved, restart your web server:
npm run start
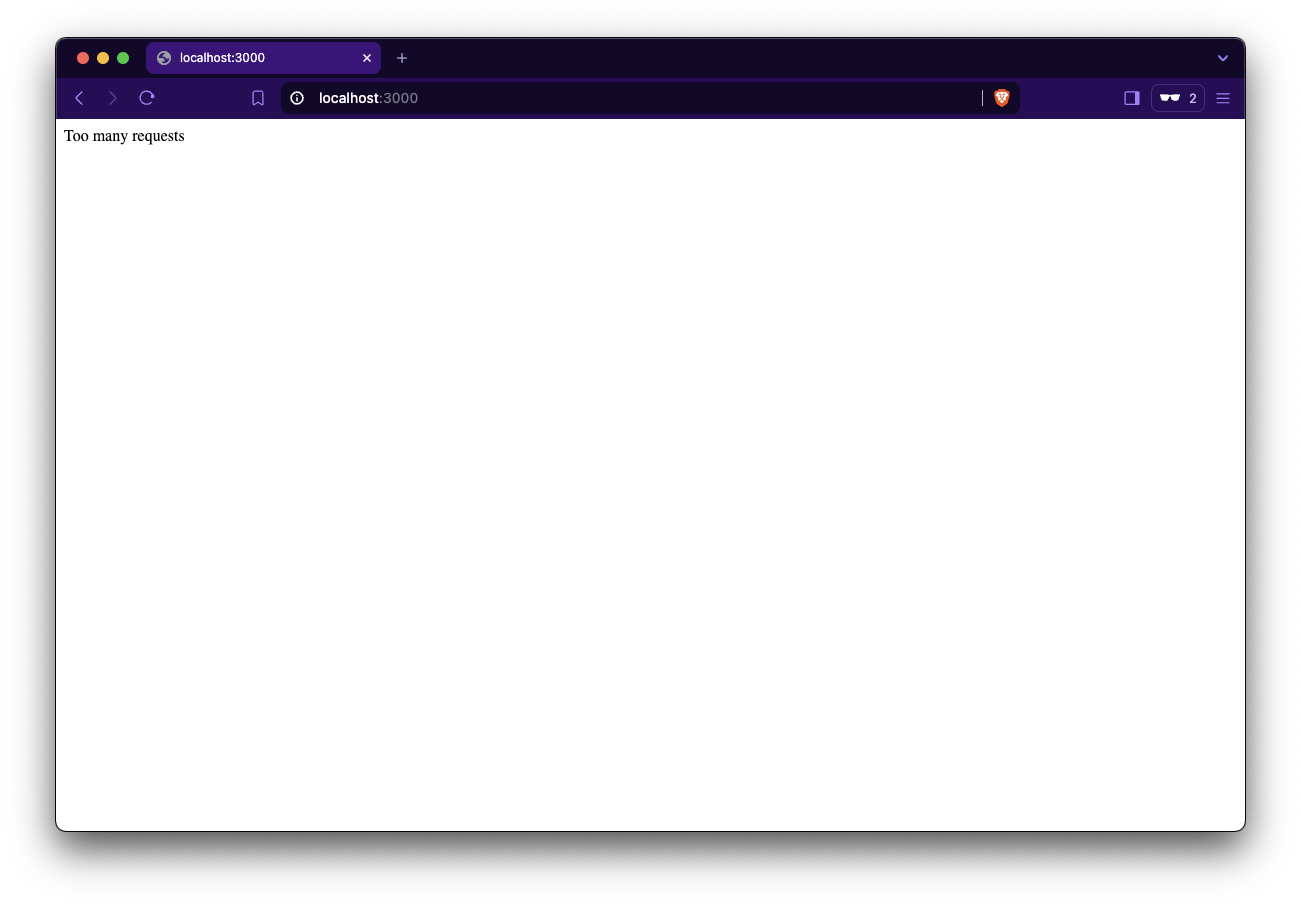
If you refresh your web page 11 times, you should find you’ve been rate-limited:
Setting up LaunchDarkly
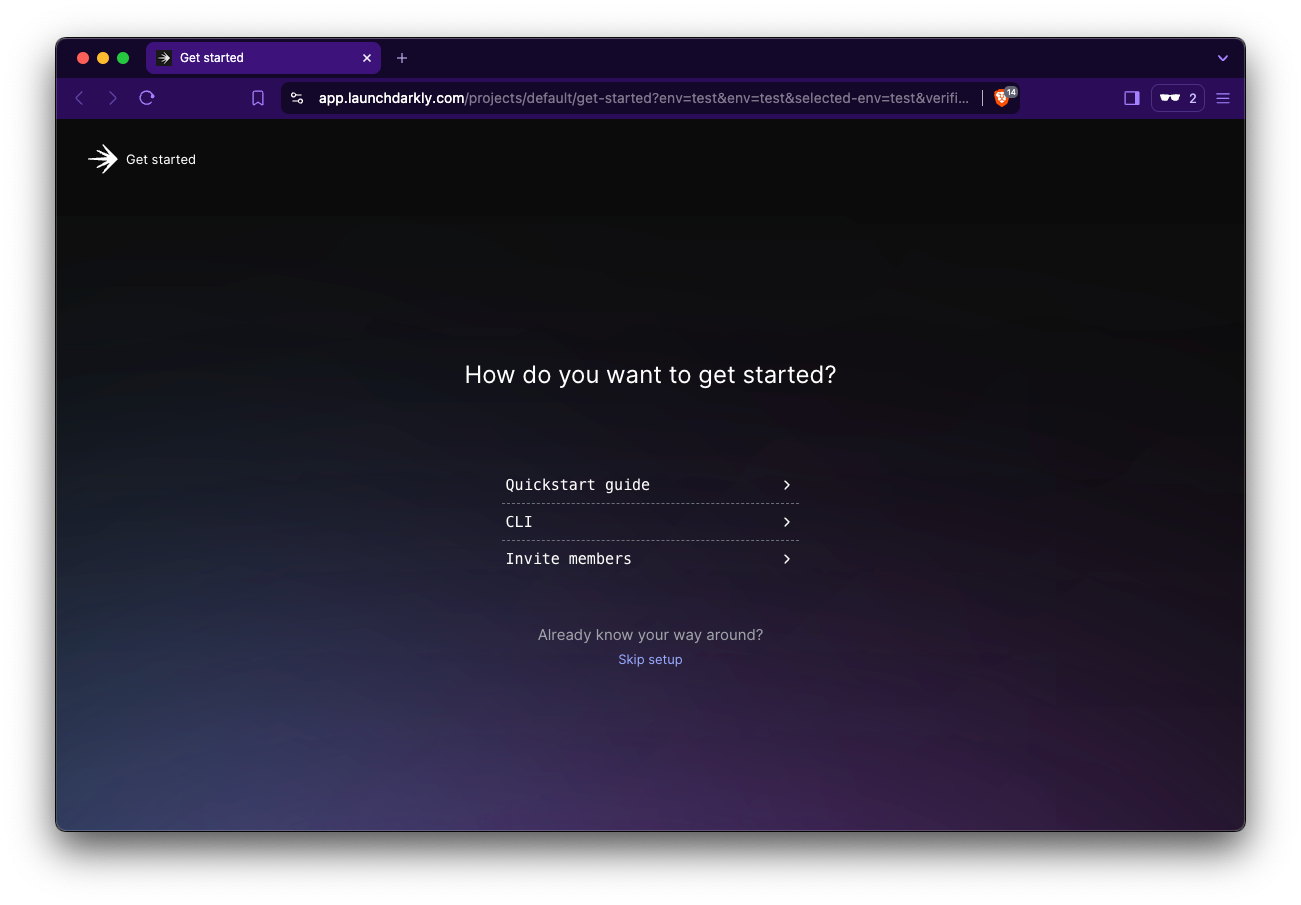
If you don’t have one yet, sign up for a free LaunchDarkly trial. From here, you can “upgrade” to a pay-as-you-go Developer account with generous free usage built-in if you wish. Once registered, you’ll be offered a few ways to get started.
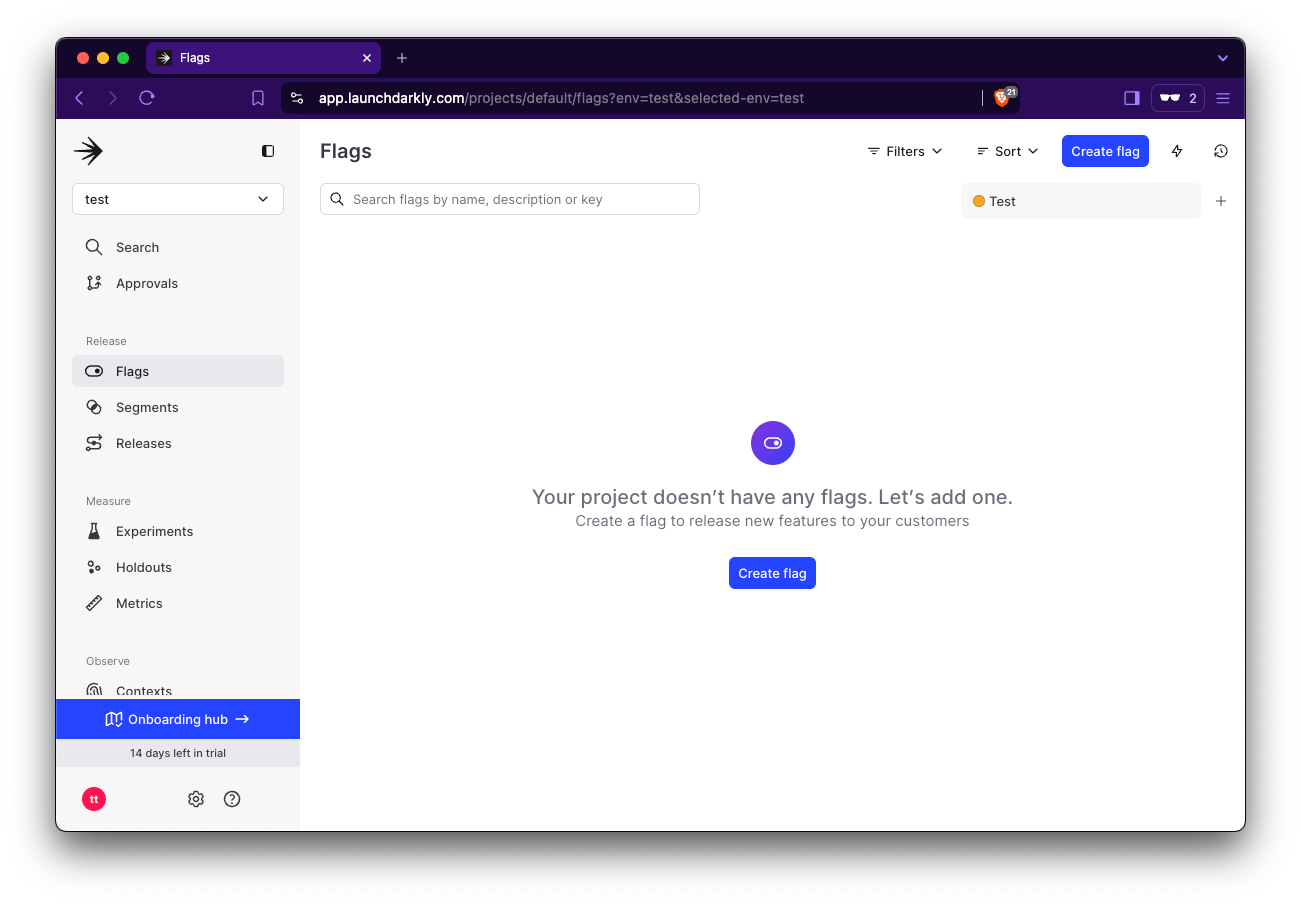
Click “Skip setup” to be taken to the Flags section of our dashboard:
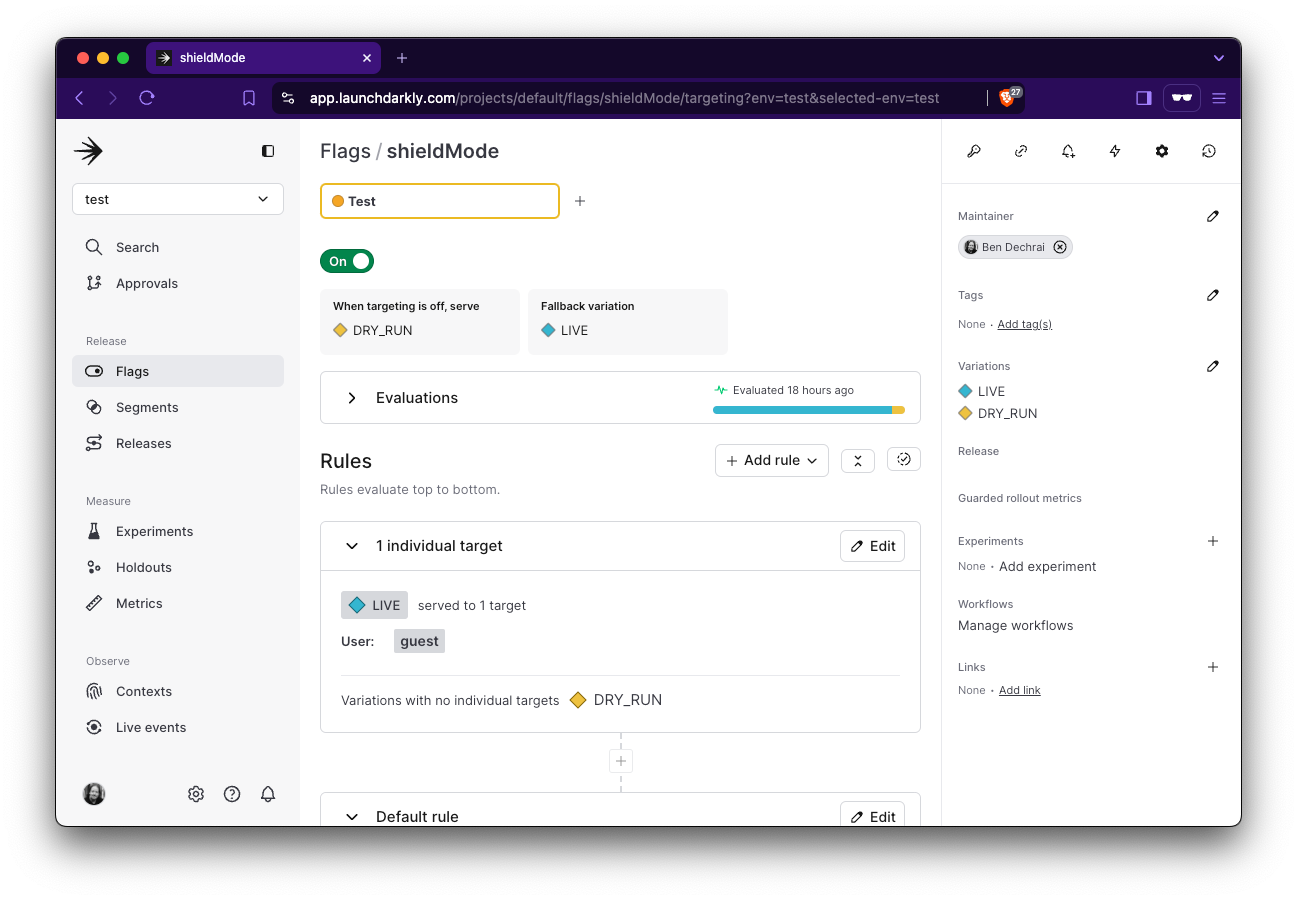
Create four flags in LaunchDarkly with the following settings:
Shield Mode
Name
shieldMode
Key
shieldMode
Configuration
Custom
Is this flag temporary?
No
Flag Type
String
Variations
Name
Value
LIVE
LIVE
DRY_RUN
DRY_RUN
Serve when targeting is ON
LIVE
Serve when targeting is OFF
DRY_RUN
Sliding Window Mode
Name
slidingWindowMode
Key
slidingWindowMode
Configuration
Custom
Is this flag temporary?
No
Flag Type
String
Variations
Name
Value
LIVE
LIVE
DRY_RUN
DRY_RUN
Serve when targeting is ON
LIVE
Serve when targeting is OFF
DRY_RUN
Sliding Window Max
Name
slidingWindowMax
Key
slidingWindowMax
Configuration
Custom
Is this flag temporary?
No
Flag Type
Number
Variations
Name
Value
Regular
100
Clamped Down
2
Serve when targeting is ON
Regular
Serve when targeting is OFF
Clamped Down
Sliding Window Interval
Name
slidingWindowInterval
Key
slidingWindowInterval
Configuration
Custom
Is this flag temporary?
No
Flag Type
Number
Variations
Name
Value
Regular
60
Clamped Down
10
Serve when targeting is ON
Regular
Serve when targeting is OFF
Clamped Down
Open each of the flags you just created, toggle the “Off/On” switch at the top of the page to the "On" position, click “Review and save”, and “Save changes”.
Adding LaunchDarkly to our Web Application
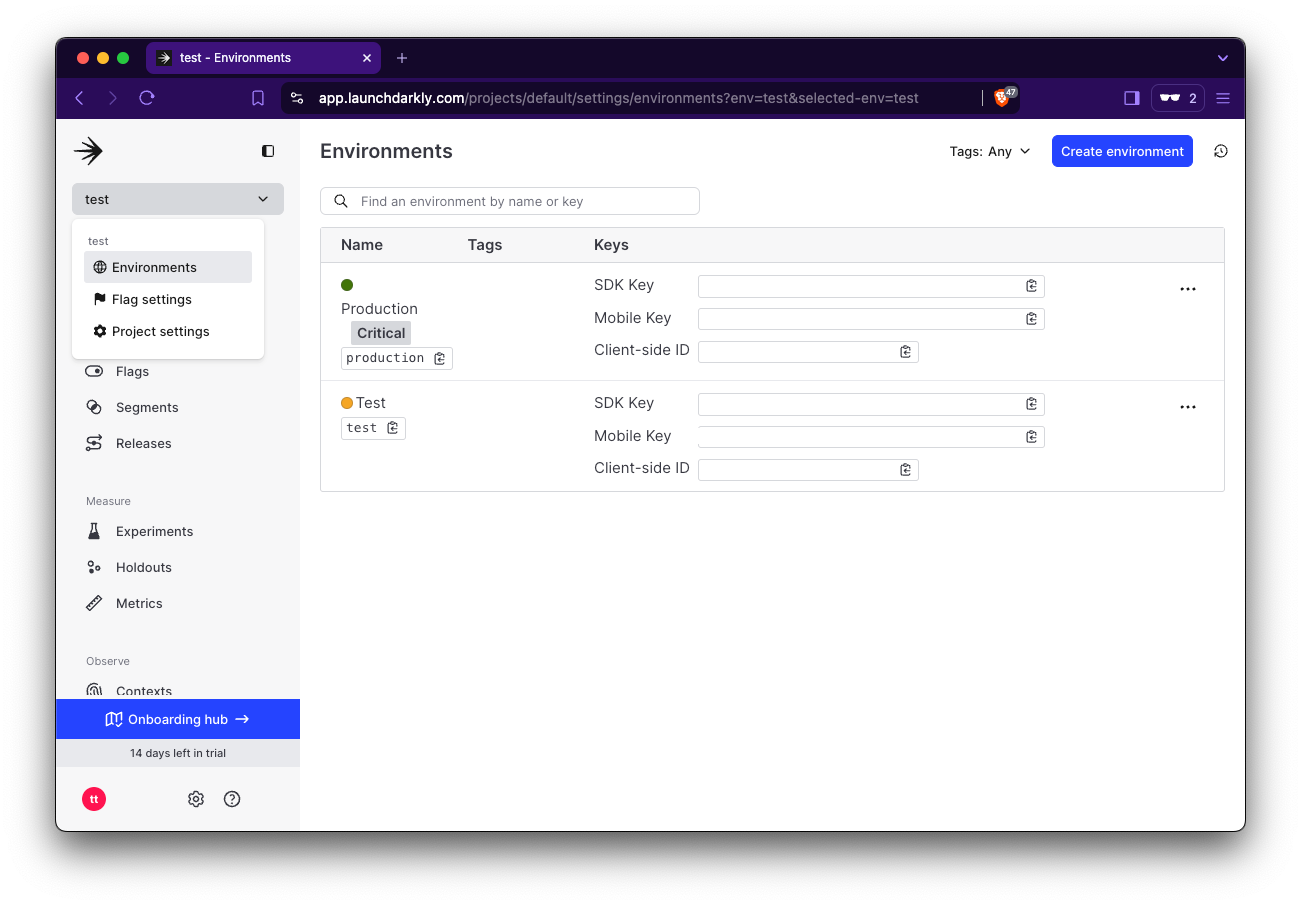
In the top left of your dashboard, click on the drop-down menu and select “Environments”, and copy the “SDK Key” from the test environment.
Add this SDK Key to your .env.local:
# Add your LaunchDarkly SDK key from
# https://app.launchdarkly.com/settings/authorization
LAUNCHDARKLY_SDK_KEY=
Install the LaunchDarkly SDK:
npm i @launchdarkly/node-server-sdk
Create a /lib/launchdarkly.js file:
// file: /lib/launchdarkly.js

import * as ld from "@launchdarkly/node-server-sdk";

// Initialize LaunchDarkly client
const client = ld.init(process.env.LAUNCHDARKLY_SDK_KEY);

export const getArcjetConfig = async () => {
  // Wait for the LaunchDarkly client to be initialized
  await client.waitForInitialization({ timeout: 1 });

  // Set the user context for LaunchDarkly - in this example,
  // every user is treated the same.
  const context = { key: "guest" };

  // Get the latest configuration from LaunchDarkly
  const shieldMode = await client.variation(
    "shieldMode",
    context,
    "LIVE"
  );
  const slidingWindowMode = await client.variation(
    "slidingWindowMode",
    context,
    "LIVE"
  );
  const slidingWindowMax = await client.variation(
    "slidingWindowMax",
    context,
    60
  );
  const slidingWindowInterval = await client.variation(
    "slidingWindowInterval",
    context,
    60
  );

  return {
    shieldMode,
    slidingWindowMode,
    slidingWindowMax,
    slidingWindowInterval,
  };
};
This file will retrieve the four flags (providing defaults should there be a network issue), which can now be used to configure Arcjet.
💡
There’s no discernible performance overhead in making four requests here, but if you like, you could also look at LaunchDarkly's JSON flag type to store all your configuration in one place.
Using LaunchDarkly flag data in Arcjet configuration
Update the /lib/arcjet.js file to look like this:
// file: /lib/arcjet.js

import _arcjet, { shield, slidingWindow } from "@arcjet/node";
import { getArcjetConfig } from "./launchdarkly.js";

// Initialize Arcjet with your site key and rules
const aj = _arcjet({
  // Get your site key from https://app.arcjet.com
  // and set it as an environment variable rather than hard coding.
  // See: https://www.npmjs.com/package/dotenv
  key: process.env.ARCJET_KEY,
  rules: [],
});

// This function will return an Arcjet instance with the latest rules
const arcjet = async () => {
  // Get the latest configuration from LaunchDarkly
  const config = await getArcjetConfig();

  // Return the Arcjet instance with the latest rules
  return aj.withRule(shield({ mode: config.shieldMode })).withRule(
    slidingWindow({
      mode: config.slidingWindowMode,
      max: config.slidingWindowMax,
      interval: config.slidingWindowInterval,
    })
  );
};

export default arcjet;
You’ll see now how the arcjet method takes our aj singleton, and dynamically adds the rules with the values from LaunchDarkly via the withRule method.
This setup only impacts the LaunchDarkly configuration, any code already importing and using the arcjet method can remain unchanged.
The Final Result
If you restart your web server now:
npm run start
You should be able to heavily refresh your web application and not hit any limitations.
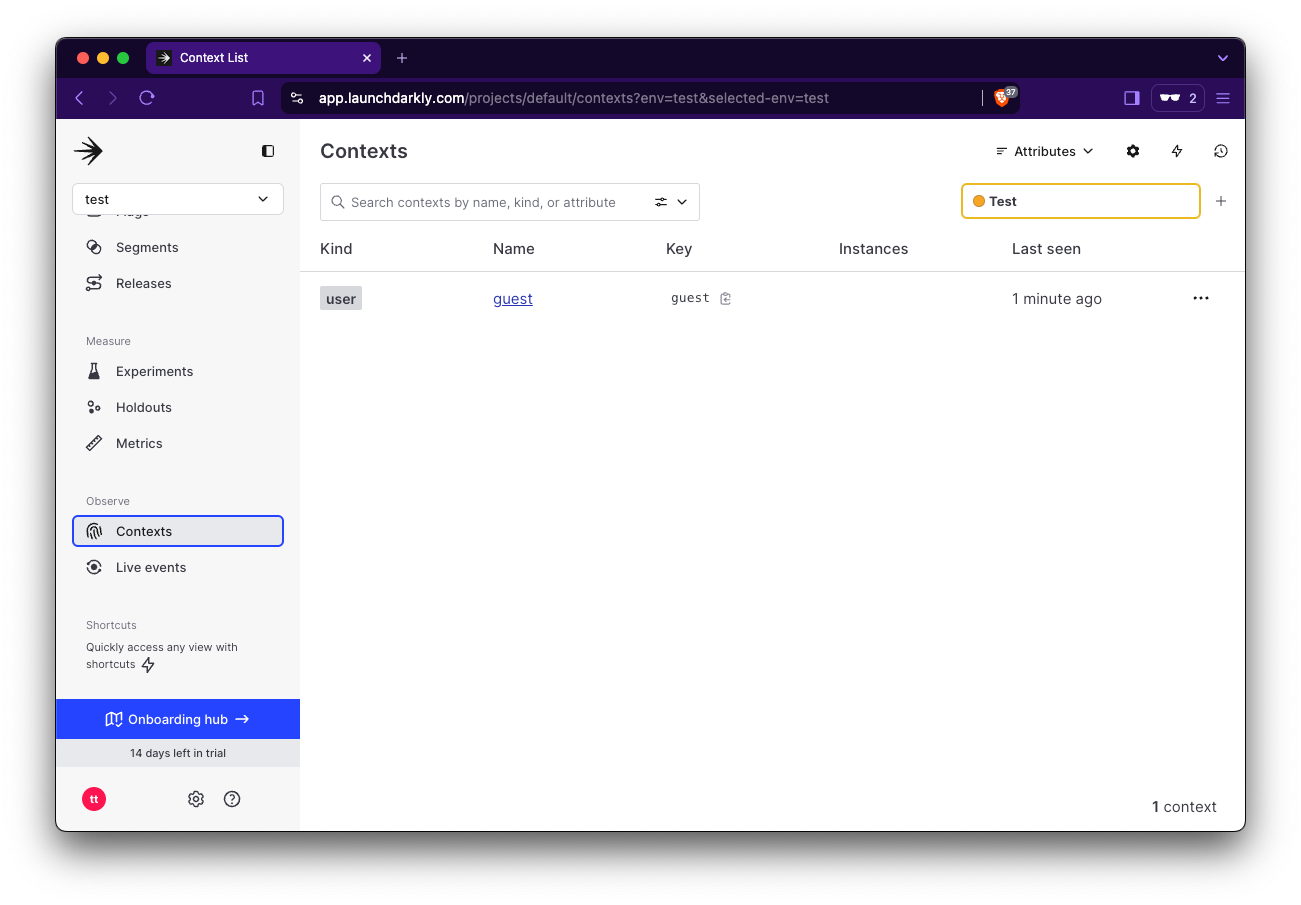
Head to the “Contexts” section of the LaunchDarkly dashboard, and you should see a “user” named “guest”.
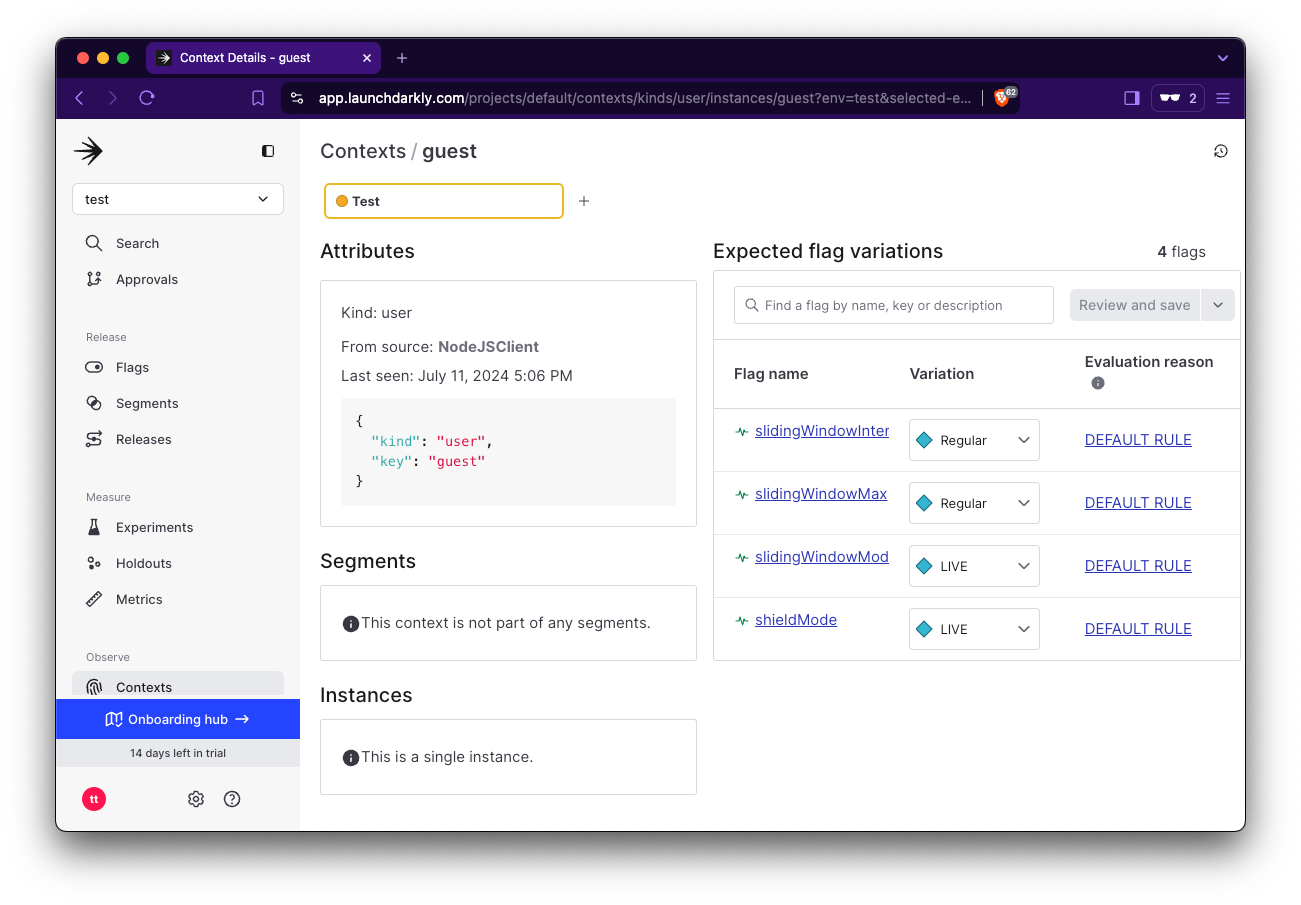
Click on “guest” and you’ll see something like this, with the four flags shown on the right:
Change the two “Regular” values to “Clamped Down”, click “Review and save”, and “Save changes”.
Now without having to restart your web server or change any code, you should be rate-limited in your application within a few requests. Give it a try!
Conclusion
By integrating Arcjet with LaunchDarkly, you can dynamically manage your web application's security settings without redeploying the application. This setup allows both technical and non-technical team members to quickly respond to changing needs and threats, enhancing your application's resilience and adaptability.
With Arcjet providing robust protection against common attacks and LaunchDarkly enabling flexible, real-time configuration management, your Node.js application can maintain high-security standards while offering the agility needed to address new challenges as they arise.
This approach improves your application's security posture and streamlines your operations, allowing for faster, more efficient responses to emerging threats.
Learn to protect Node.js apps from SQL injection and XSS attacks. This hands-on guide covers vulnerable code examples, attack demonstrations, and practical security measures to safeguard your application.
An experimental feature in Node 22 will finally allow ESM code to be required on CommonJS environments, making it much easier to use ESM-only libraries in frameworks like NestJS